Setting up the Greenhouse integration
Brainner is a platform that automates resume screening by using AI to analyze and sort candidates based on recruiter criteria. It seamlessly integrates with Greenhouse, automatically syncing job listings and candidate resumes. This guide will provide you with all the information you need to connect both solutions effectively.
In this guide you will know how to fully configure your Greenhouse integration and start using Brainner.
*Note: You must be a team or organization with admin rights in Brainner and in Greenhouse to install this integration.
To set up the Brainner integration, follow these steps:
- Step 1: Create a Harvest API Key in Greenhouse
- Step 2: Enter the API Key into Brainner
- Step 3: Create the Webhooks in Greenhouse
Detailed instructions are provided below.
Step 1: Create a Harvest API key
To configure the Brainner integration, you’ll need to create a Harvest API key.
Follow the these steps to create the key:
1. Log in to your Greenhouse account
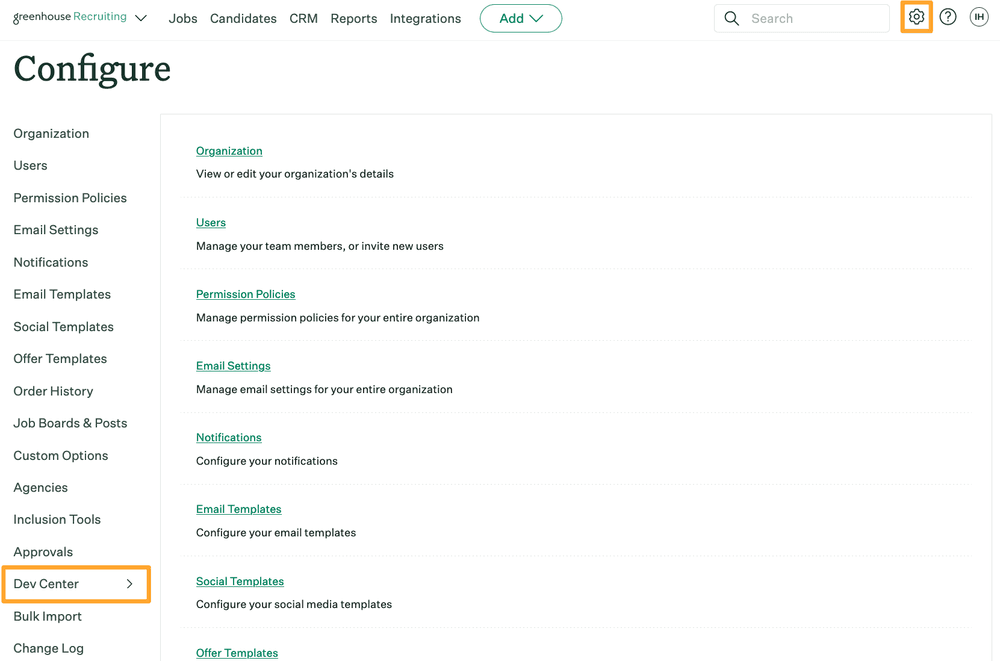
2. Click the Configure icon on your navigation bar, then click Dev Center on the left menu.
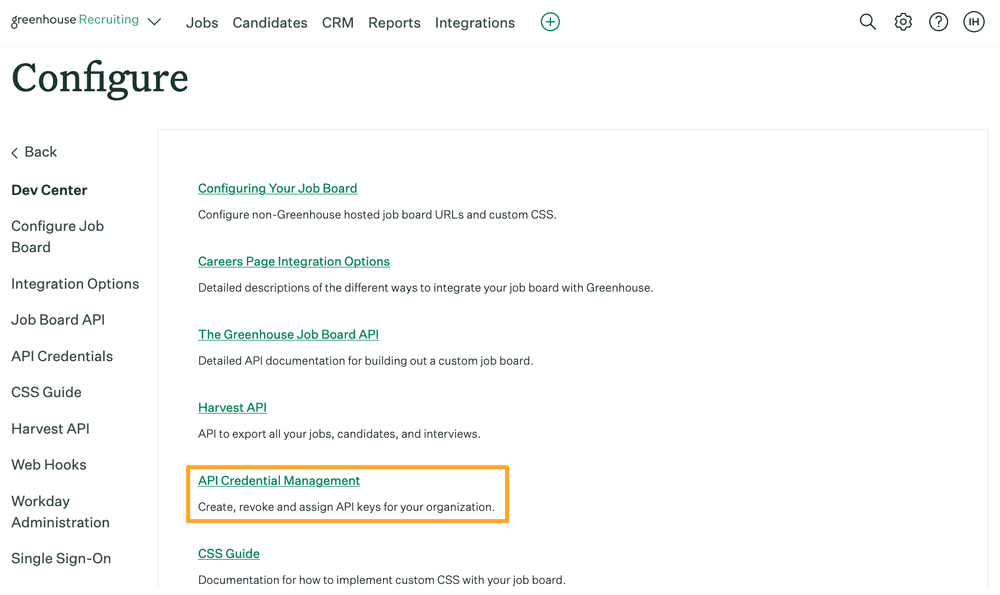
3. Click API Key Credential Management
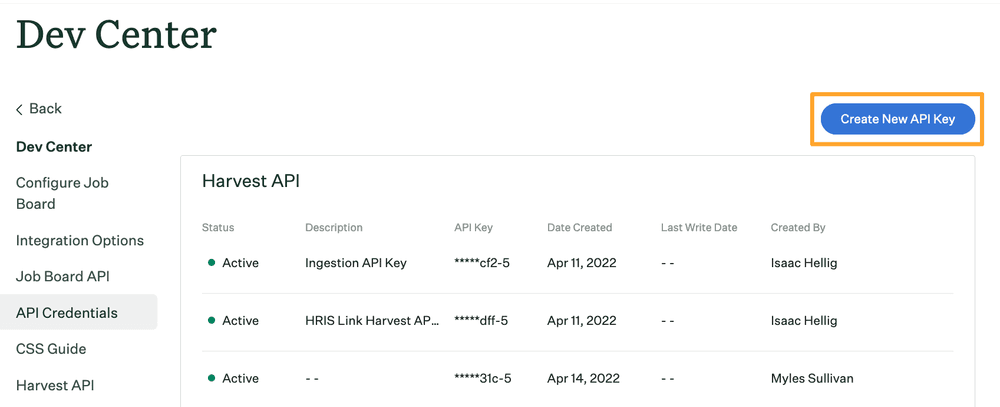
4. Click Create New API Key.
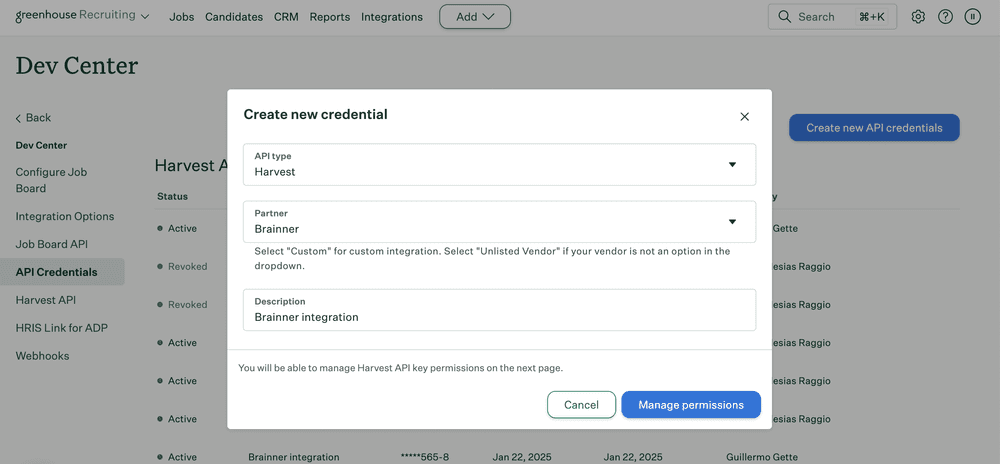
5. In the 'Create New Credential' box, make the following selections and click Manage Permissions:
- API Type: Harvest
- Partner: Brainner
- Description: Brainner Integration
6. Click Copy to get your API Key and store it. Then click I have stored the API Key.
*Note: you can't access the full API key again after clicking I have stored the API Key. If you lose your API key and need to access it later, you must create a new API key, provide it to the integration, and then revoke access to the original key.

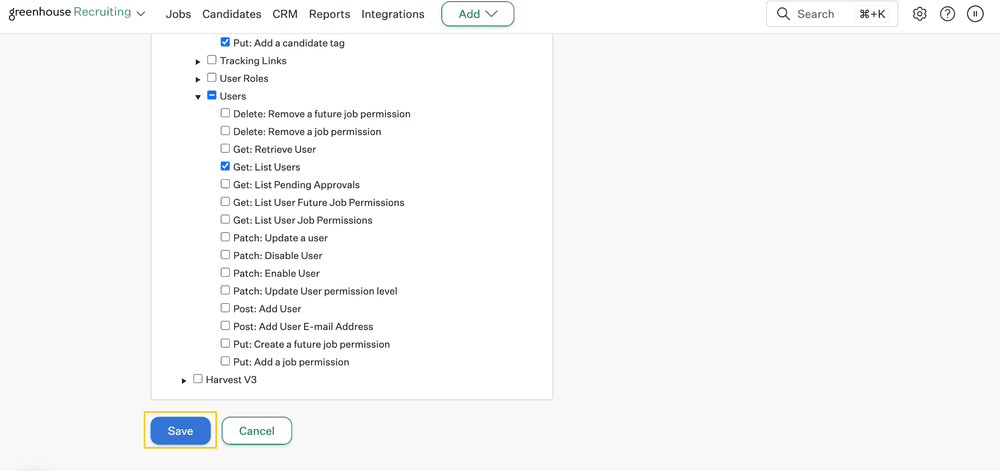
7. Next, you will see the permissions requested for the integration. Check that all the following accesses are granted to ensure the process runs smoothly. Then, click "Save" at the bottom of the screen. Then click Save at the bottom of the screen.
Harvest V1
Applications
✔️ Delete: Delete Application
✔️ Get: Retrieve Application
✔️ Get: List Applications
✔️ Patch: Update Application
✔️ Patch: Convert a prospect
✔️ Patch: Update a rejected application's rejection reason
✔️ Post: Advance Application
✔️ Post: Add Attachment to Application
✔️ Post: Hire Application
✔️ Post: Move Application
✔️ Post: Reject Application
✔️ Post: Moves Application to Job
✔️ Post: Unreject Application
Candidates
✔️ Delete: Delete Candidate
✔️ Delete: Delete Education
✔️ Delete: Delete Employment
✔️ Get: Retrieve Candidate
✔️ Get: List Candidates
✔️ Patch: Edit Candidate
✔️ Post: Add Candidate
✔️ Post: Add E-mail
✔️ Post: Add Note
✔️ Post: Add Attachment
✔️ Post: Add Application
✔️ Post: Add Education
✔️ Post: Add Employment
✔️ Post: Add Prospect
✔️ Put: Anonymize Candidate
✔️ Put: Merge two candidates
Job Posts
✔️ Get: List Job Posts
✔️ Get: Retrieve Job Post for Job
✔️ Get: List Job Posts for Job
✔️ Patch: Update job posts
Jobs
✔️ Get: Retrieve Job
✔️ Get: List Jobs
Job Stages
✔️ Get: List Job Stages for Job
✔️ Get: Retrieve Job Stage
✔️ Get: List Job Stages
Rejection Reasons
✔️ Get: List Rejection Reasons
Sources
✔️ Get: List Sources
Tags
✔️ Delete: Remove tag from candidate
✔️ Delete: Remove Candidate Tags
✔️ Get: List tags applied to candidate
✔️ Get: List Candidate Tags
✔️ Post: Add New Candidate Tags
✔️ Put: Add a candidate tag
Users
✔️ Get: List Users
Step 2: Enter the API key into Brainner
After generating the API key in Greenhouse, log in to Brainner and follow these steps to enter it:
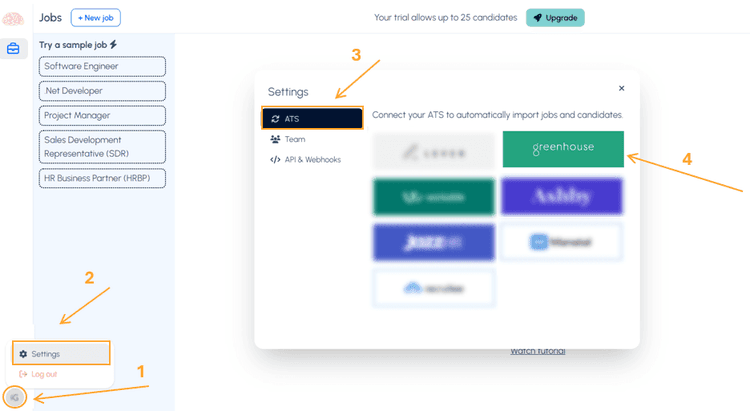
1. Log in to your Brainner account and click on your Profile Icon on the bottom left side.
2. Click Settings .
3. Click on the ATS tab.
4. Select Greenhouse from the list of integrations.
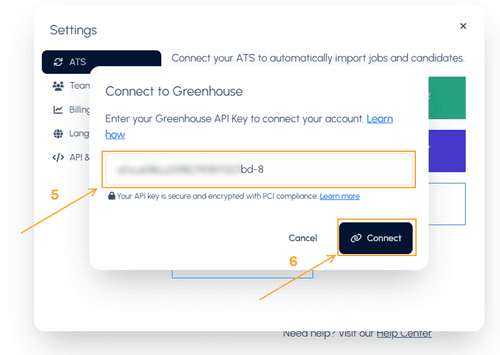
5. Paste the Greenhouse API Key.
6. Click Connect
7. Toggle the preferred settings. We recomments the options: 'Auto-import candidates from Greenhouse', 'Keep candidate stages in sync' and 'Push Evaluation results to Greenhouse’.
8. Click on Apply Changes
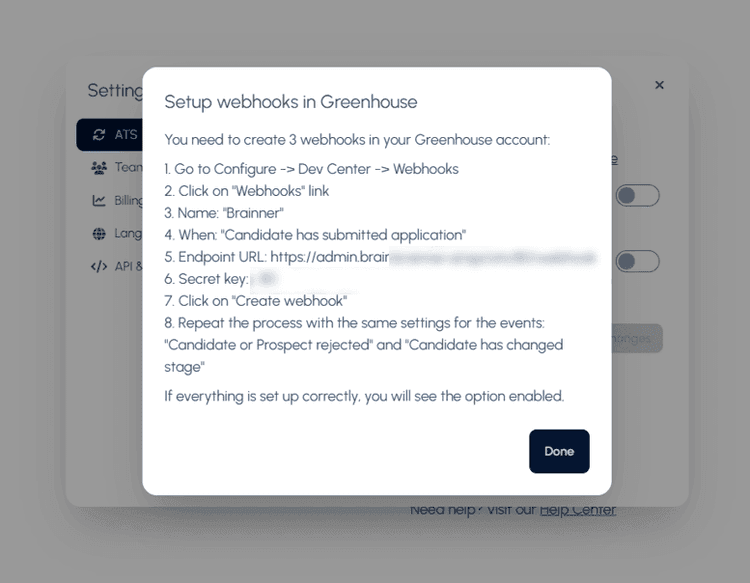
9. After applying the changes, a pop-up will appear with the final steps, including the Endpoint URL and Secret Key needed to create the Webhooks in Greenhouse. Copy this information as it will be requested in Greenhouse.
Step 3: Create the webhooks
To integrate Brainner with Greenhouse Recruiting, you’ll need to create three webhooks. Follow these steps to create your webhooks.
1. Log in to your Greenhouse account
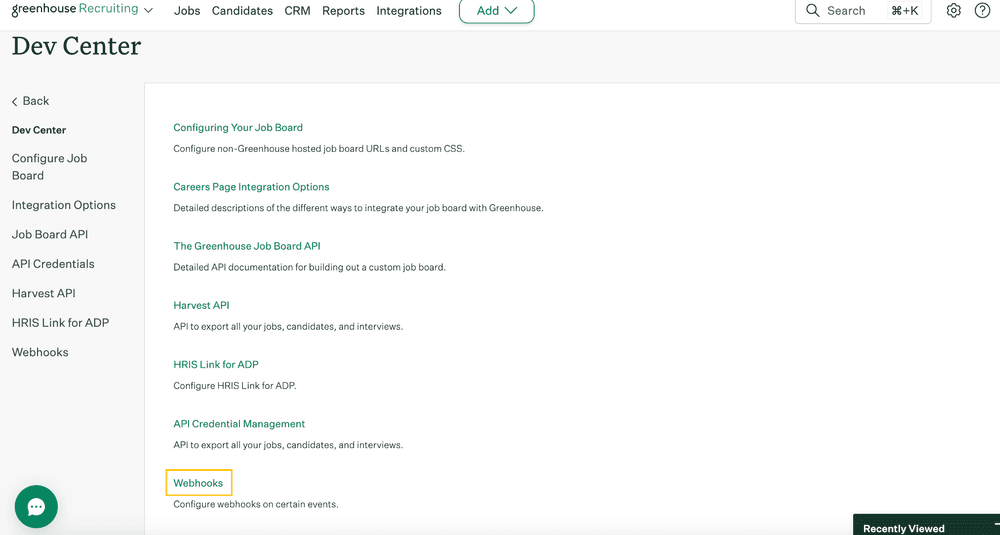
2. Click the Configure icon on your navigation bar, then click Dev Center on the left menu.
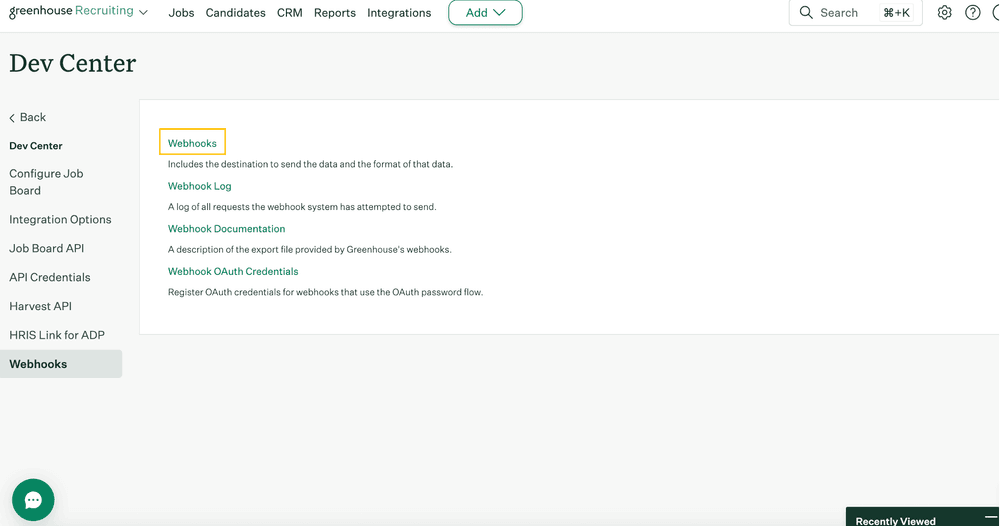
3. Click Webhooks > Webhooks.
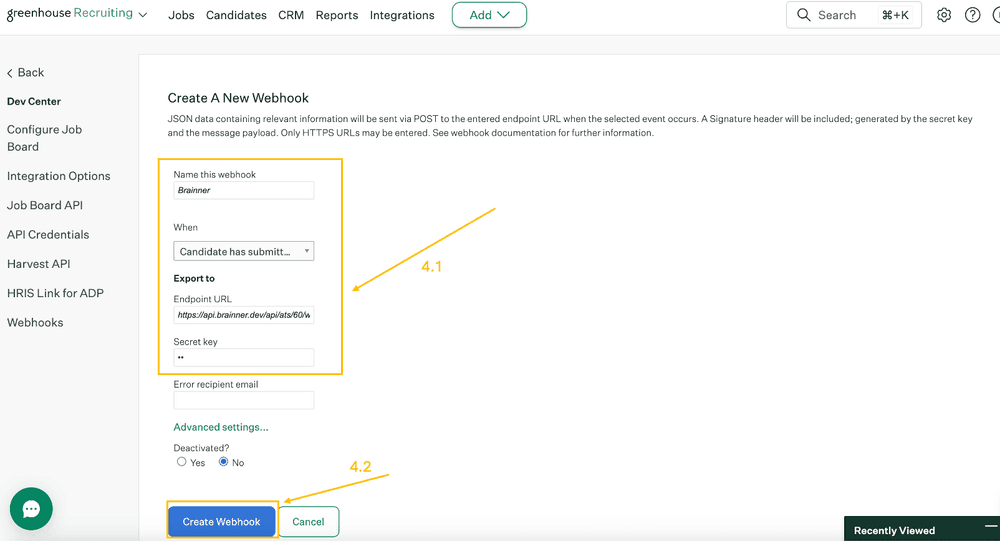
4. Enter the setup information and click 'Create Webhook'. You will have to repeat the process three times to create these three different webhooks:
Webhook #1
- Name: A descriptive name for your integration. Most customers choose ‘Brainner integration 1’
- When: "Candidate has submitted application”
- Endpoint URL: The Endpoint URL provided by Brainner
- Secret Key: The Secret Key provided by Brainner
Webhook #2
- Name: A descriptive name for your integration. Most customers choose ‘Brainner integration 2’
- When: “Candidate or Prospect rejected"
- Endpoint URL: The Endpoint URL provided by Brainner
- Secret Key: The Secret Key provided by Brainner
Webhook #3
- Name: A descriptive name for your integration. Most customers choose ‘Brainner integration 3’
- When: “Candidate has changed stage"
- Endpoint URL: The Endpoint URL provided by Brainner
- Secret Key: The Secret Key provided by Brainner
Congratulations! The integration between Brainner and Greenhouse is ready! If everything is set up correctly you will see the option "Sync Candidates from Greenhouse" enabled in Brainner.