Getting started with Ashby
Brainner is a platform that automates resume screening by using AI to analyze and sort candidates based on recruiter criteria. It seamlessly integrates with Ashby, automatically syncing job listings and candidate resumes. This guide will provide you with all the information you need to connect both solutions effectively. With Brainner, you can save time, hire faster, and improve hiring accuracy.
Setting up the Ashby integration
On Ashby
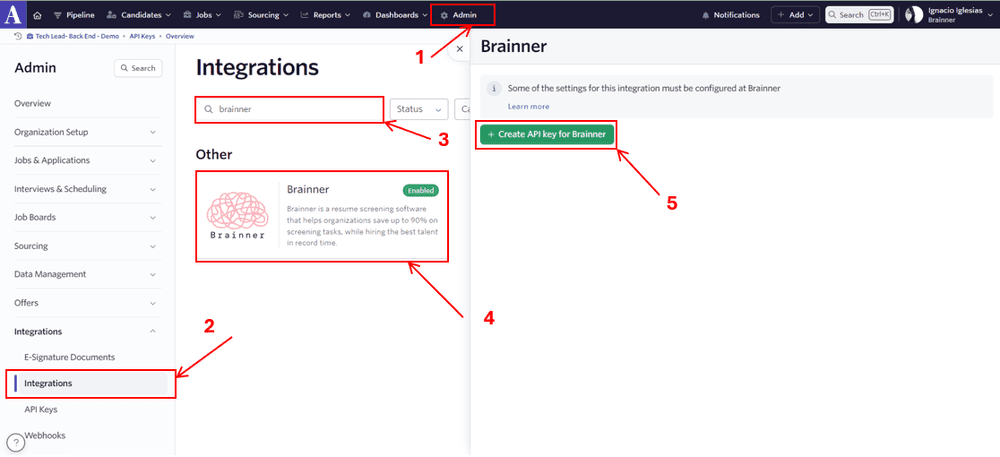
1. Click on ‘Admin’
2. In the left menu, click on ‘Integrations'
3. In the search bar, enter 'Brainner’
4. Click on the Brainner Icon.
5. Click on ‘Create API Key for Brainner’
6. Copy the API Key and store it in a safe place, as you will need to enter it in Brainner.
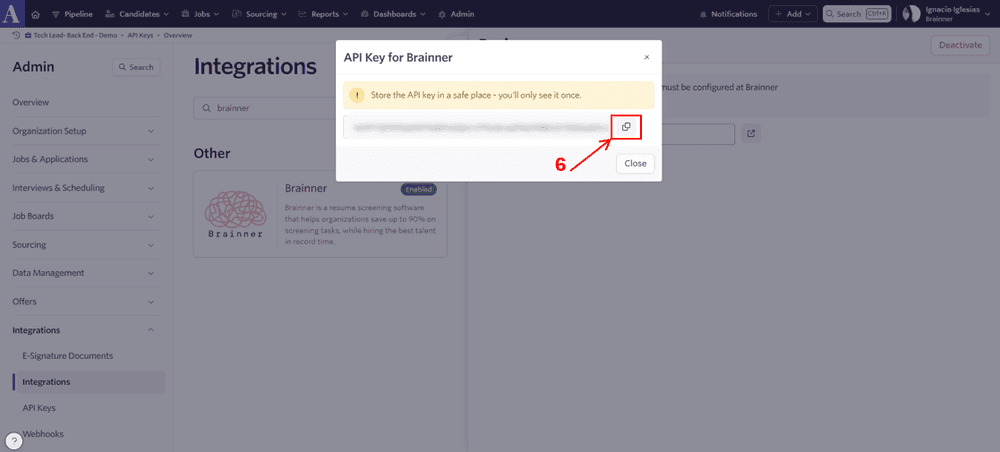
7. After copying the API Key, go to Brainner
On Brainner
Integrate with Ashby by entering the API Key:
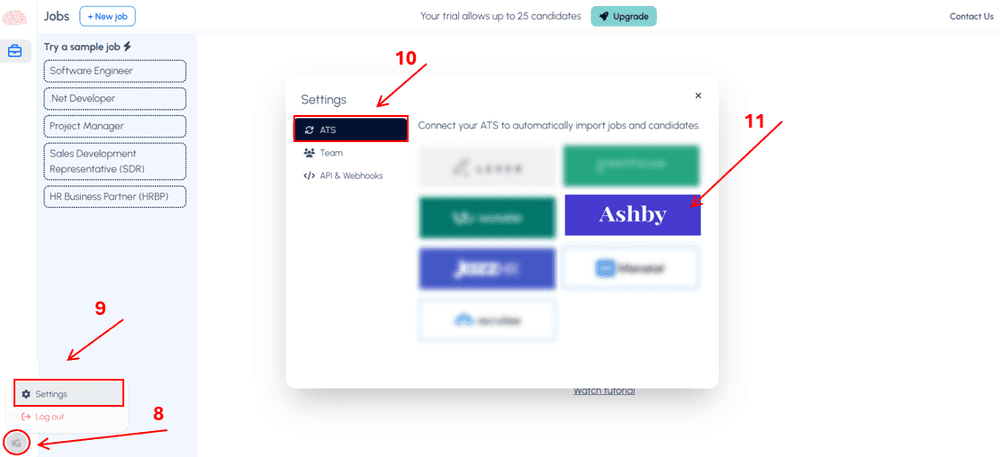
8. Log in to your Brainner account and click on your Profile Icon on the bottom left side.
9. Click 'Settings'.
10. Click on the ATS tab.
11. Select Ashby from the list of integrations.
12. Paste the API Key and click on ‘Save’
13. Configure the integration settings and click on ‘Save’.
○ Enable the option ‘Auto-import new candidates from Ashby’, if you want to automatically import candidates into Brainner jobs when they apply via Ashby to the corresponding job created in Brainner.
○ Enable ‘Auto-generate jobs in Brainner’, if you want to automatically create jobs when a candidate applies through Ashby to a job not yet created in Brainner.
● Congratulations! The connection between Brainner and Ashby is active!
Using the Brainner integration with Ashby
This part of the guide will explain how to start using the integration.
Let’s review the step by step:
1. In Ashby, the process starts with the Job Posting.
2. Go to Brainner, click on ‘Import a Job’
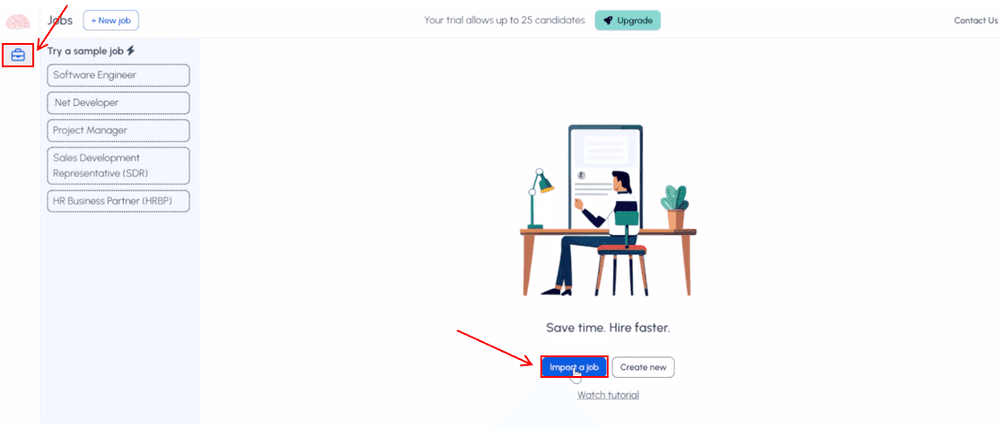
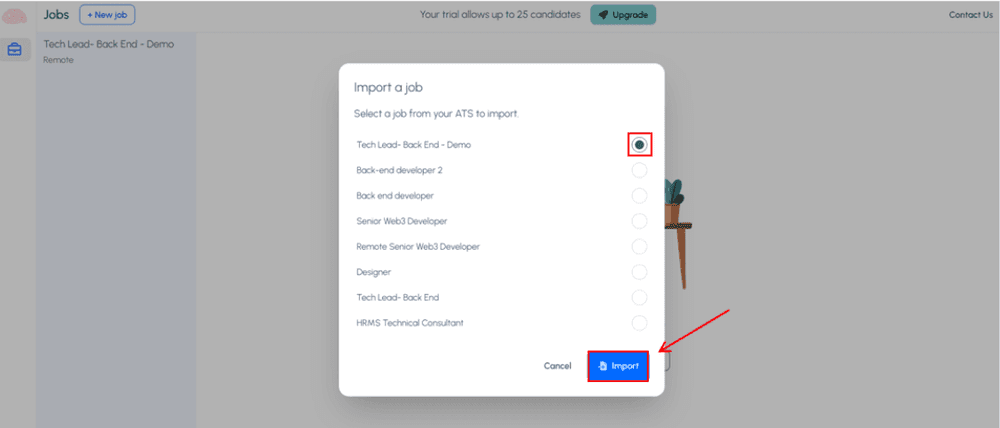
3. Select the job to import from the list displayed and click ‘Import’.
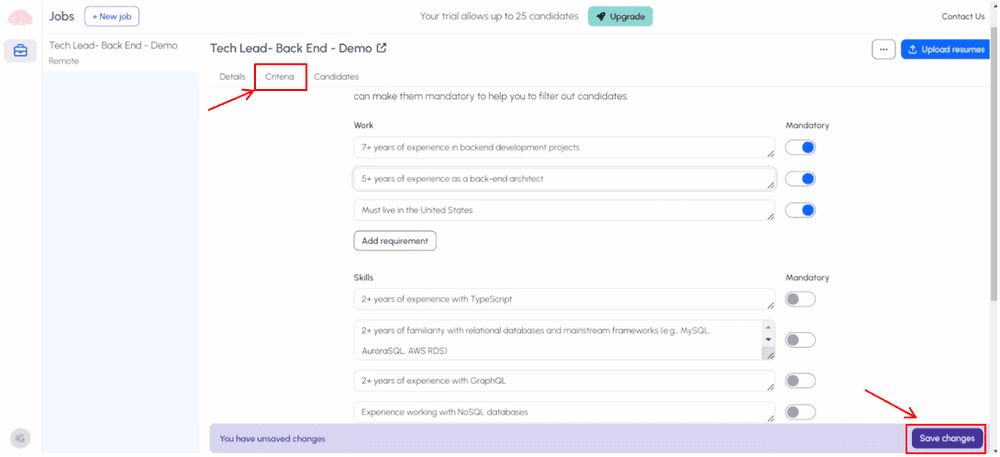
4. In the Criteria Tab, you will find all the requirements automatically extracted from the Job Description. It is important to check that the requirements meet your recruitment needs. You can add, delete or modify any of the requirements.
For guidance, please refer to our quick tutorial video on how to customize criteria.
5. If it is a new job and no candidates have applied yet, you will start receiving candidates automatically from Ashby.
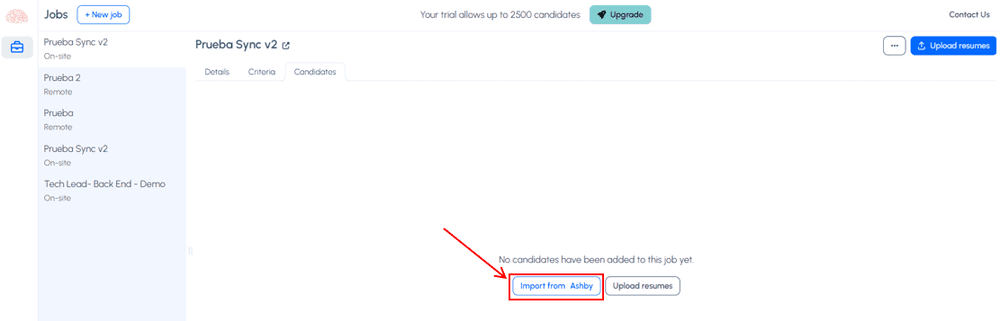
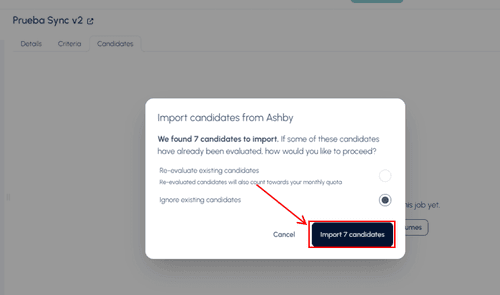
For a previous job where candidates have already applied in Lever, you will need to click ‘Import from Ashby’ in the Candidates Tab to retrieve them. After this, any new candidates who apply will also be received automatically.
6. Select if you want to re-evaluate existing candidates or not, and click ‘Import [X number] Candidates’.
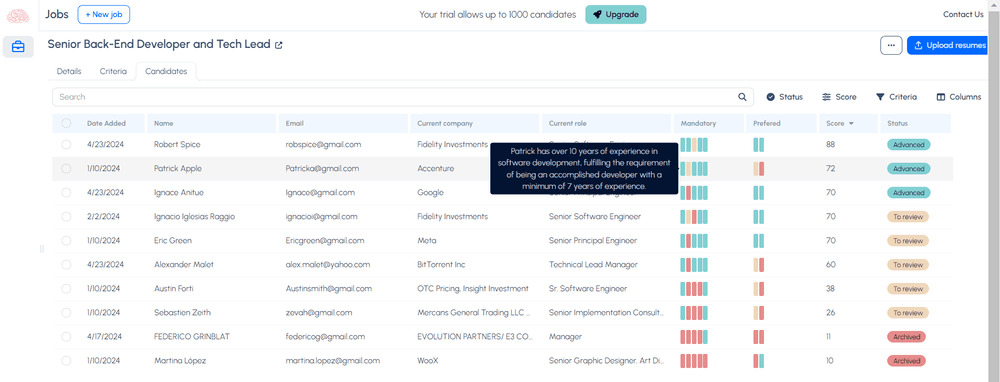
7. Candidates will be imported, analyzed, scored and ranked automatically based on the defined criteria. The analysis will be displayed in a table format and an individual report will be available for each candidate.
New candidates applying to the position in Ashby, will be imported, analyzed and added to the report.
For more information please refer to our tutorial video on How to navigate the Candidates Report.
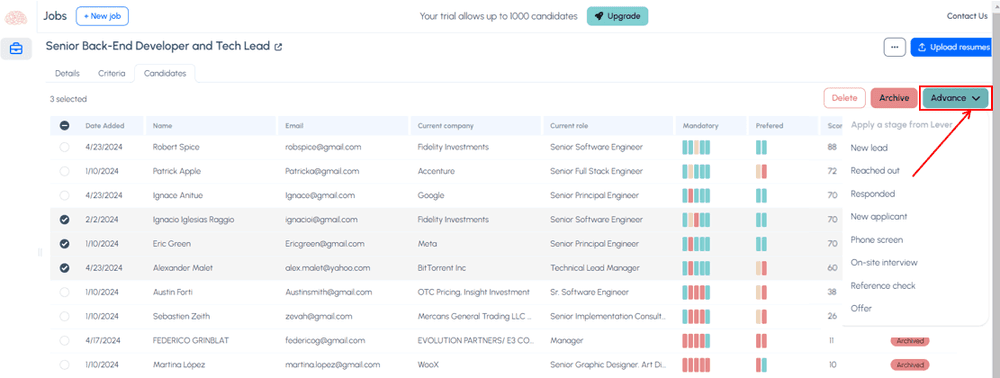
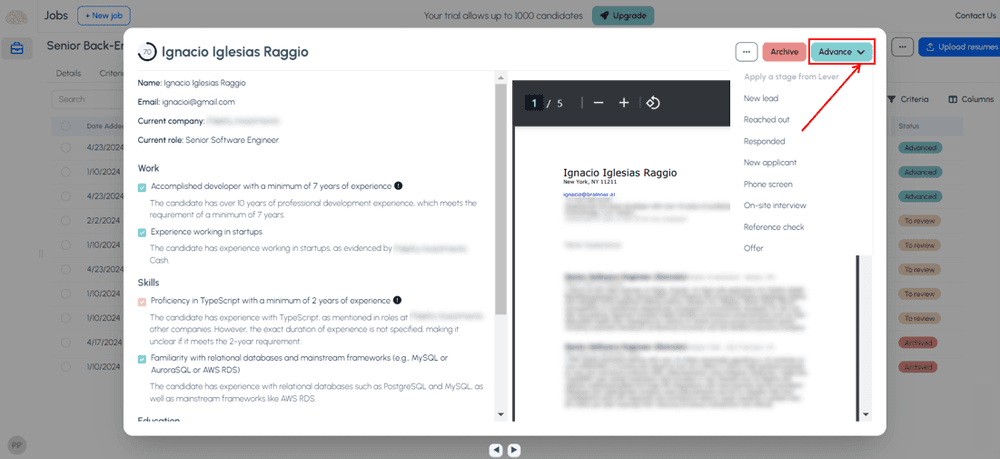
8. Archive reasons and stages will be imported from Lever and you will be able to archive or advance the candidates individually or bulk. These information will be updated automatically in the candidate in Ashby.
.Individually:
.Bulk: