Setting up the Ashby integration
In this guide you will know how to fully configure your Ashby integration with Brainner.
On Ashby
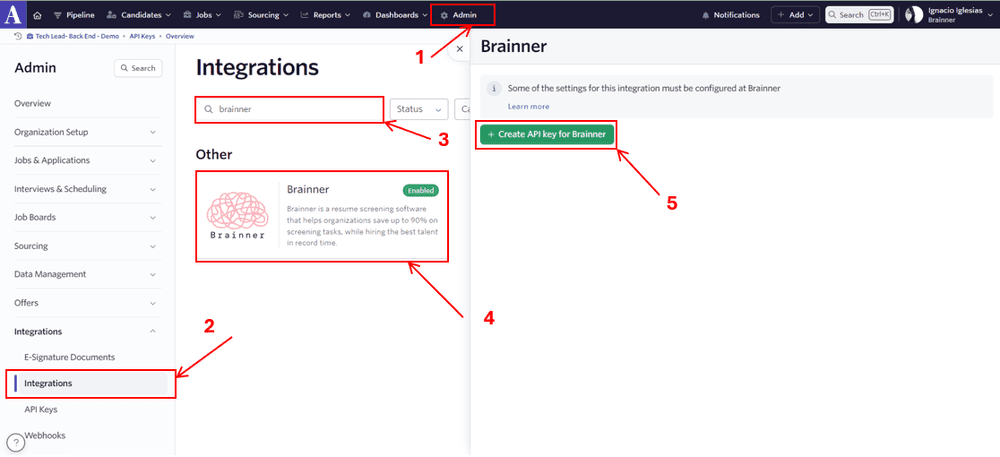
1. Click on ‘Admin’
2. In the left menu, click on ‘Integrations'
3. In the search bar, enter 'Brainner’
4. Click on the Brainner Icon.
5. Click on ‘Create API Key for Brainner’
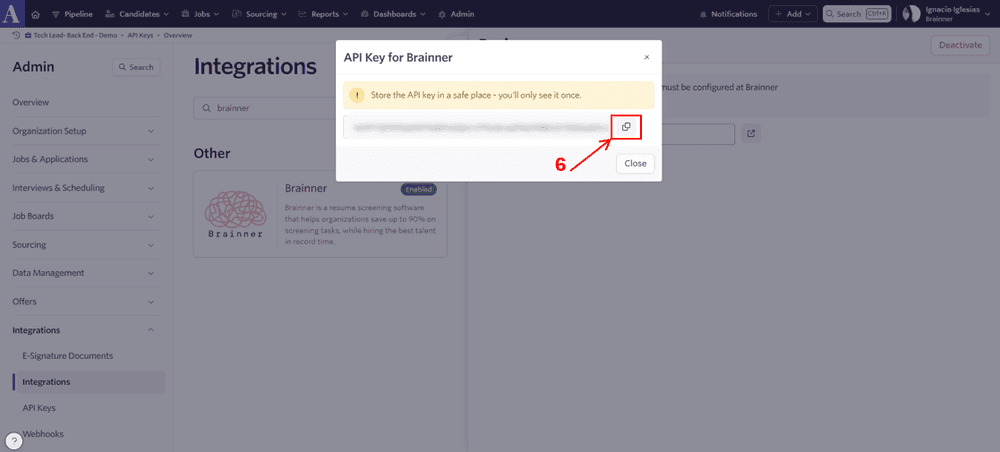
6. Copy the API Key and store it in a safe place, as you will need to enter it in Brainner.
7. After copying the API Key, go to Brainner
On Brainner
Integrate with Ashby by entering the API Key:
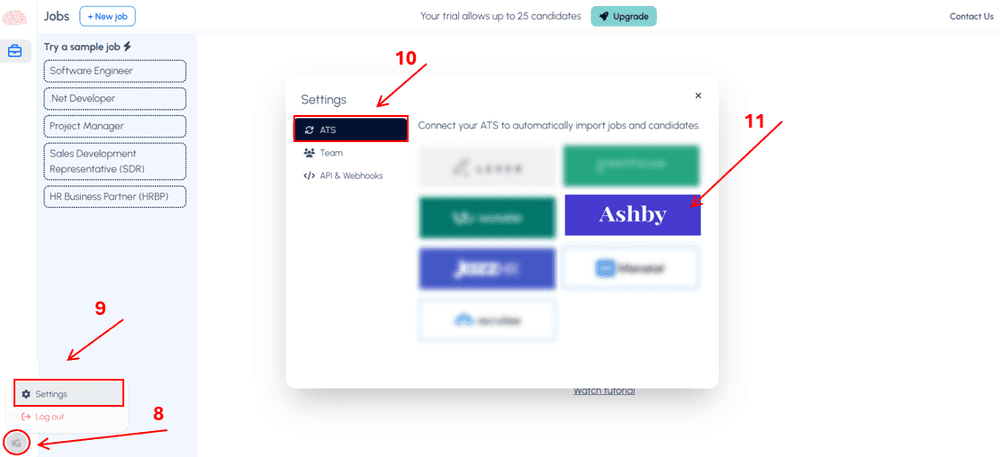
8. Log in to your Brainner account and click on your Profile Icon on the bottom left side.
9. Click 'Settings'.
10. Click on the ATS tab.
11. Select Ashby from the list of integrations.
12. Paste the API Key and click on ‘Save’
13. Configure the integration settings and click on ‘Save’.
○ Enable the option ‘Auto-import new candidates from Ashby’, if you want to automatically import candidates into Brainner jobs when they apply via Ashby to the corresponding job created in Brainner.
○ Enable ‘Auto-generate jobs in Brainner’, if you want to automatically create jobs when a candidate applies through Ashby to a job not yet created in Brainner.
● Congratulations! The connection between Brainner and Ashby is active!