Getting started with Lever
Brainner is a platform that automates resume screening by using AI to analyze and sort candidates based on recruiter criteria. It seamlessly integrates with Lever, automatically syncing job listings and candidate resumes. This guide will provide you with all the information you need to connect both solutions effectively.
Check out Brainner's the following getting started video to learn how to configure the integration and start using the platform.
Setting up the Lever integration
You must be a team or organisation with admin rights in Brainner and Super Admin rights in Lever to install this integration.
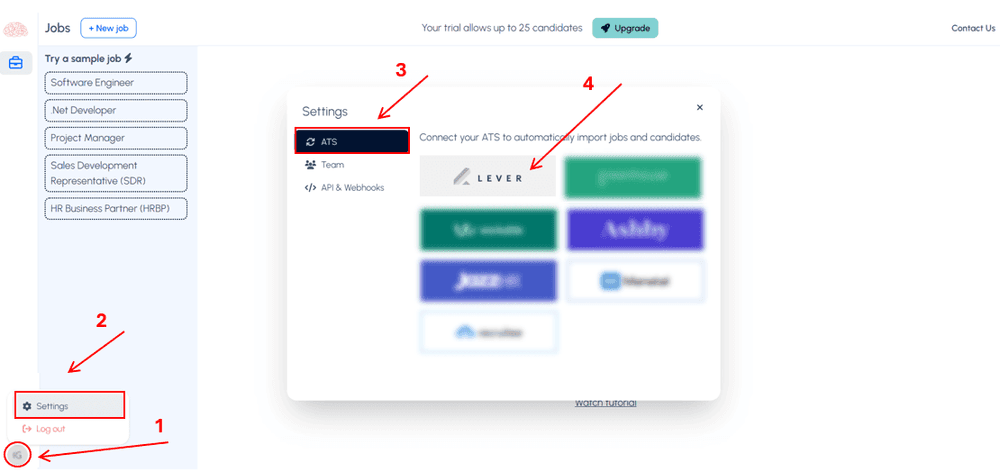
1. Log in to your Brainner account and click on your Profile Icon on the bottom left side.
2. Click Settings .
3. Click on the ATS tab.
4. Select Lever from the list of integrations.
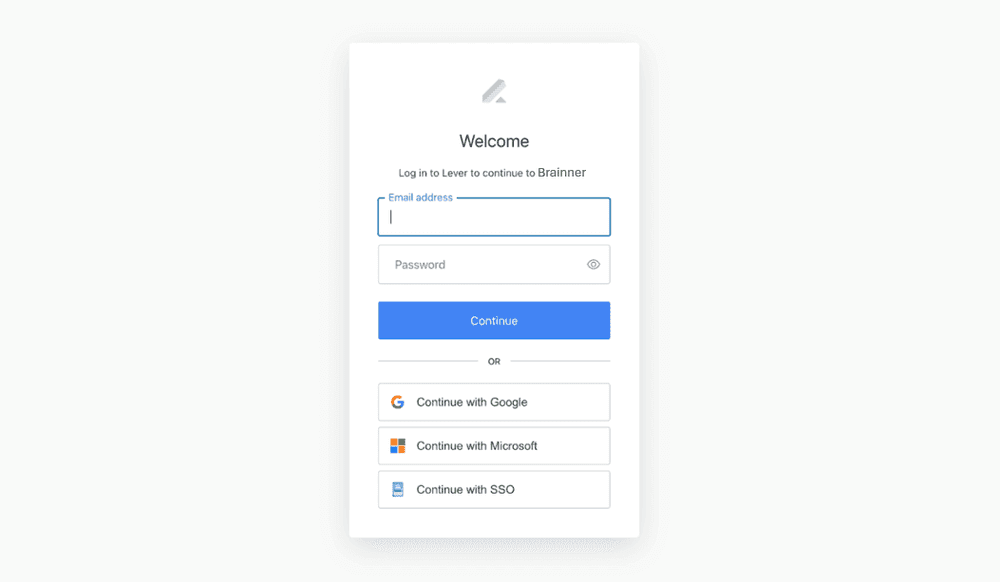
5. Sign-in to your Lever account to connect both platforms. Use your usual Lever credentials to log in and authorize the integration.
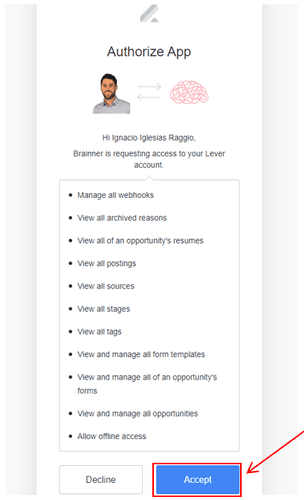
6. Click Accept to authorize the integration.
As you can see from the image below, Brainner will need these permissions to: import jobs, candidates, tags, stages, forms, sources and rejection reasons automatically from Lever, and post the results and update stages in the candidate’s profile in Lever.
- Congratulations! The connection between Brainner and Lever is active!
There are still a few quick steps we will need you to take to configure Lever for this integration.
Configuring the Lever integration
Though you have activated the connection, there are still a few steps you need to take to complete the configuration.
After authorizing the integration, the settings window will appear automatically in Brainner. If by any reason you were not redirected to the settings window, you can get there by clicking on your Profile Picture and then Settings.
Configure preferences
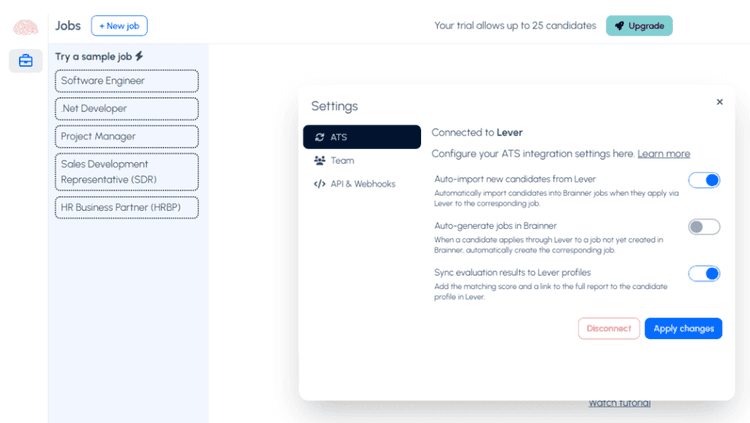
7. In the ATS tab, configure the integration settings and click Apply Changes.
If you toggle all the settings, you will start receiving jobs and candidates automatically. Jobs will be sent from Lever automatically the first time that a candidate applies, regardless of whether it is old or new.
When you start using Brainner, we suggest disabling the ‘Auto-generate jobs’ setting, as shown in the screenshot below. This enables you to manually import jobs, giving you better control over the job creation process in Brainner, while still ensuring that candidates are automatically received for those jobs.
If you want to import both jobs and candidates manually, you can simply turn off all the settings.
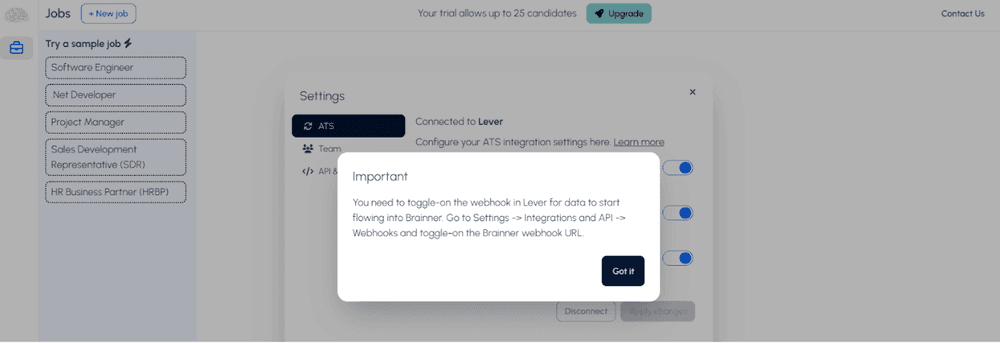
8. A window will open highlighting the next step, that is configuring the Webhook in Lever. A webhook is a technical term that describes the action of notifying the Brainner platform of new candidates automatically.
Configure webhooks
The integration adds a new webhook configuration for when a new application is created. This webhook is disabled on Lever by default, so you must enable it. Once enabled, Lever will communicate to Brainner the required information to send new jobs and candidates.
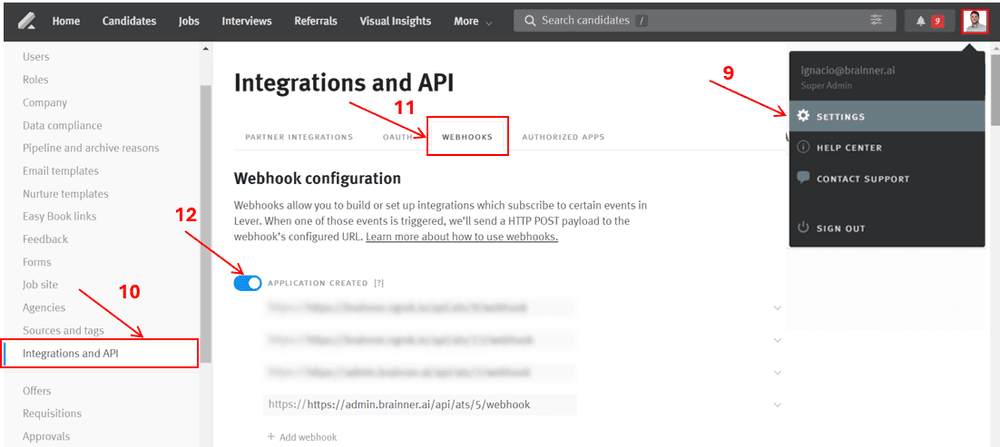
9. In Lever, go to Settings.
10. Click on Integrations and API on the left side menu.
11. Click on the Webhooks tab.
12. If they are not already toggled, toggle all the webhooks related to Brainner.
Using the Brainner integration
This part of the guide will explain how to start using the integration.
Let’s review the step by step:
1. In Lever, the process starts with the Job Posting.
2. Go to Brainner, click on the briefcase and then click ‘Import a Job’
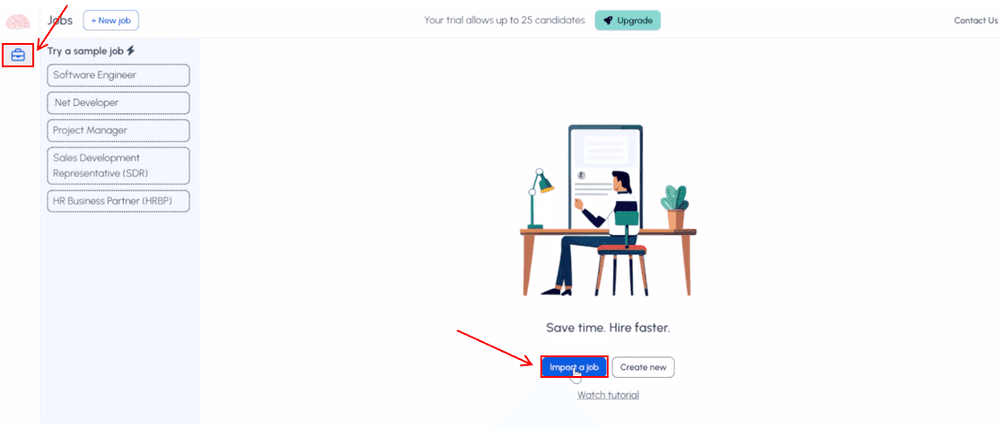
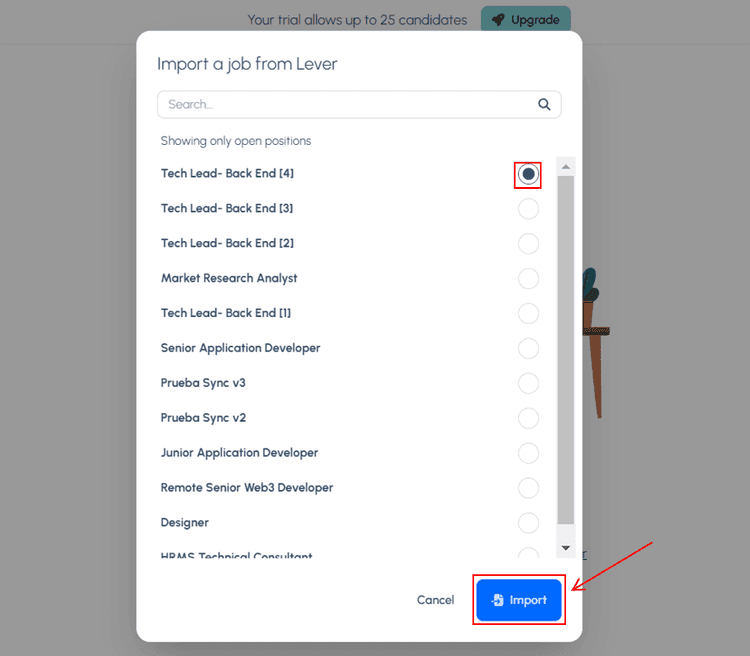
3. Search and Select the job to import from the list displayed, and click ‘Import’.
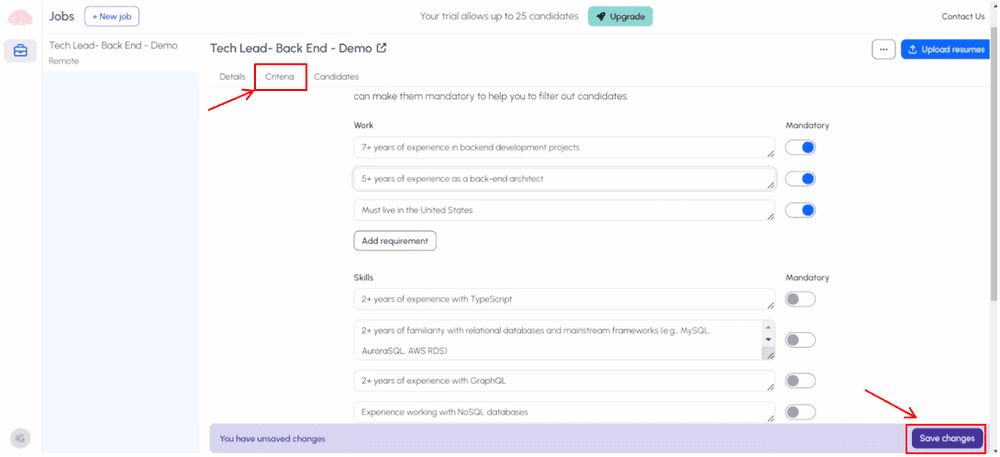
4. In the Criteria Tab, you will find all the requirements automatically extracted from the Job Description. It is important to check that the requirements meet your recruitment needs. You can add, delete or modify any of the requirements.
For guidance, please refer to our quick tutorial video on how to customize criteria.
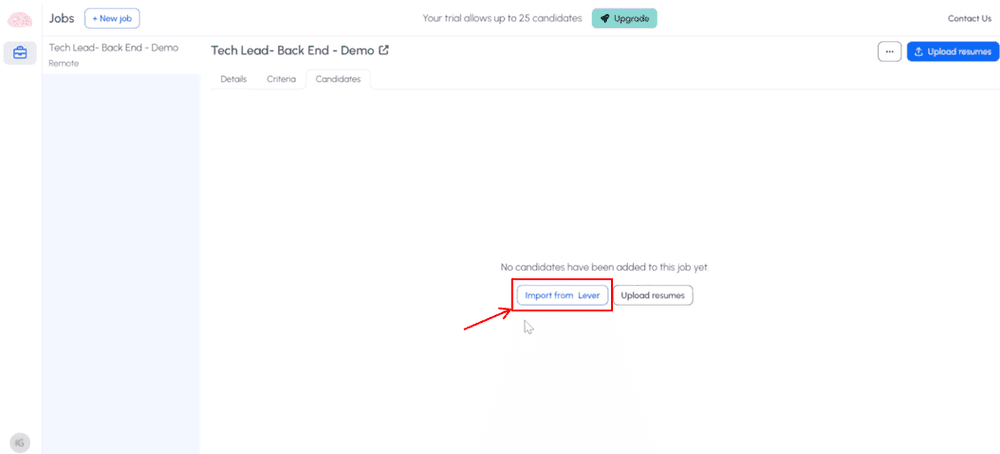
5. If it is a new job and no candidates have applied yet, you will start receiving candidates automatically from Lever.
For a previous job where candidates have already applied in Lever, you will need to click ‘Import from Lever’ in the Candidates Tab to retrieve them. After this, any new candidates who apply will also be received automatically.
6. Select if you want to re-evaluate existing candidates or not, use the filters if needed and click ‘Import Candidates’.
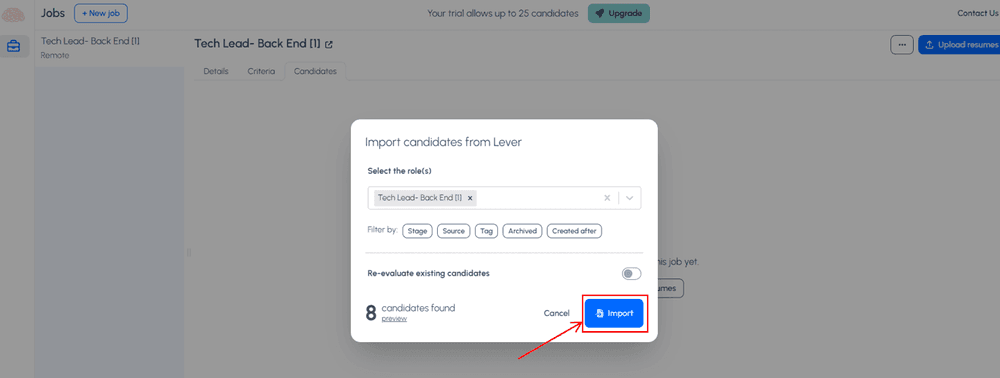
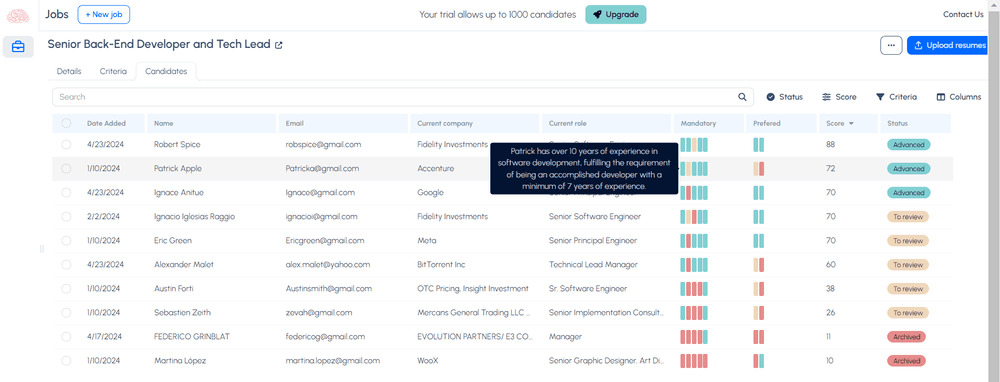
7. Candidates will be imported, analyzed, scored and ranked automatically based on the defined criteria. The analysis will be displayed in a table format and an individual report will be available for each candidate.
New candidates applying to the position in Lever, will be imported, analyzed and added to the report.
For more information please refer to our tutorial video on How to navigate the Candidates Report.
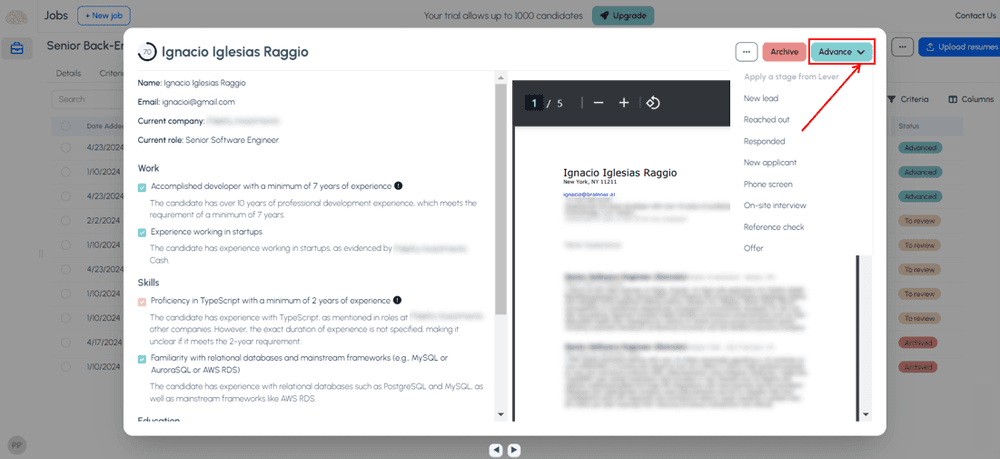
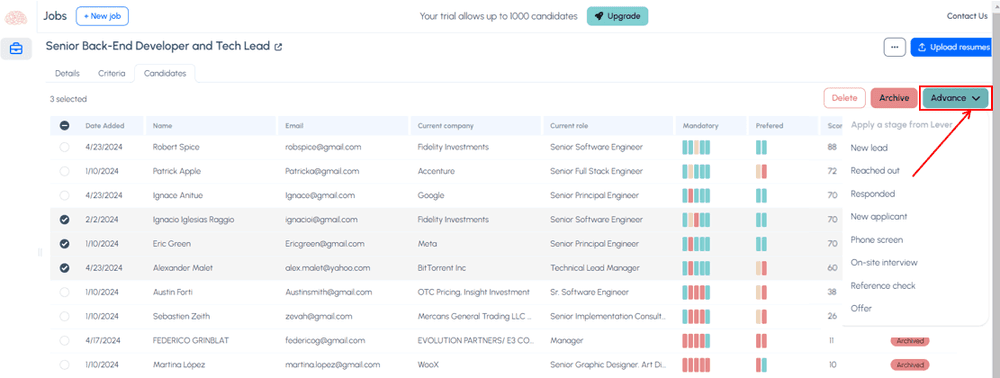
8. Archive reasons and stages will be imported from Lever and you will be able to archive or advance the candidates individually or massively. These information will be updated automatically in the candidate in Lever.
.Individually:
.Massively:
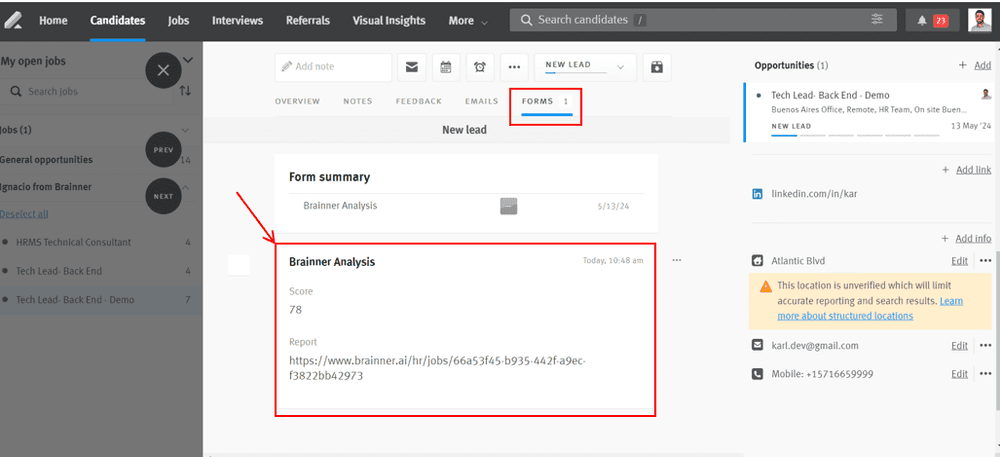
9. In Lever, in the ‘Forms’ tab of the candidate, you will find the score provided by Brainner and a link to the report.